If you’re a beginner and you can’t yet do a proper pull-up, you’re not alone. This exercise is notoriously difficult to master. So what If I were to tell you that a cheap resistance band can help you overcome your obstacle? Sounds good right? Well, this is a comprehensive guide on what resistance band pull-ups are, why they’re effective, and how to do them properly!
Resistance bands are a popular way to provide pull-up assistance. They are effective for helping beginners to practice the movement by serving as a counterweight to support body weight. The banded pull-up is set up by looping a band around the bar and the body.
Early disclaimer- some people argue against the effectiveness of the band-assisted pull-up.
But speaking from personal experience, I know they have a place for helping a beginner to overcome their pull-up hurdle!
Keep reading to find out what banded pull-ups do, how to set them up, and how they can benefit you!
- Recommended Resistance Bands For Pull-Up Assistance
- What Are Resistance Band Pull-Ups?
- How Do Band-Assisted Pull-Ups Work?
- How To Set Up Assisted Pull-Ups With A Resistance Band
- How To Use Resistance Bands To Do Assisted Pull-Ups
- Why Resistance Bands Help With Pull-Ups
- Are Band-Assisted Pull-Ups Really Effective?
- Benefits Of Doing Resistance Band Pull-Ups
- Muscles Worked By Banded Pull-Ups
- How Many Reps And Sets To Do With Assisted Pull-Ups
- Resistance Band Size For Band-Assisted Pull-Ups
- Progressing With The Banded Pull-Up
- Best Resistance Bands For Pull-Up
- Conclusion
Recommended Resistance Bands For Pull-Up Assistance
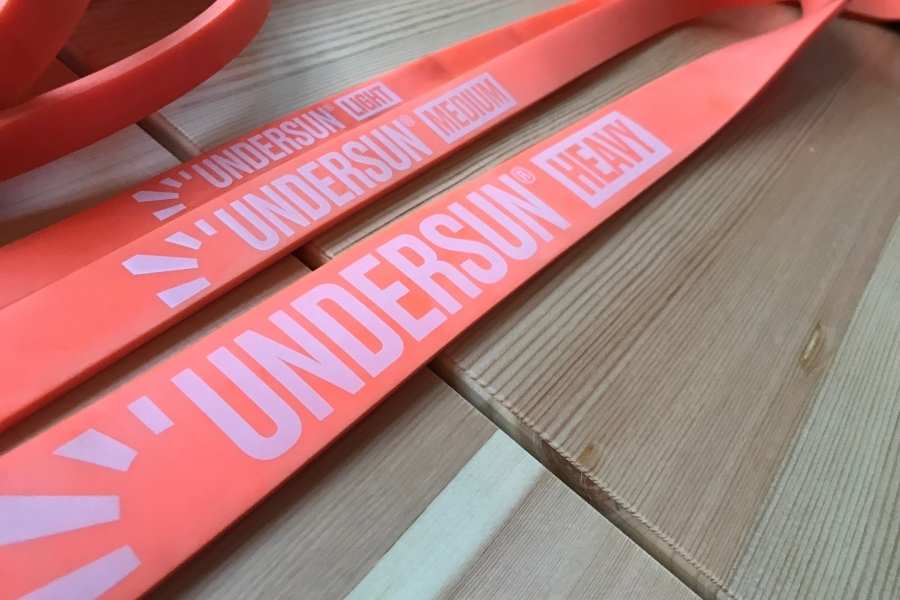
You’ll see me using the Undersun Fitness resistance bands throughout this post.
Having tried over half a dozen bands- from cheap tube-style ones to moderately-priced pull-up bands and loop bands- I can say that these are my favorite.
They may not be the most expensive, but they definitely are the best value for money in my opinion.
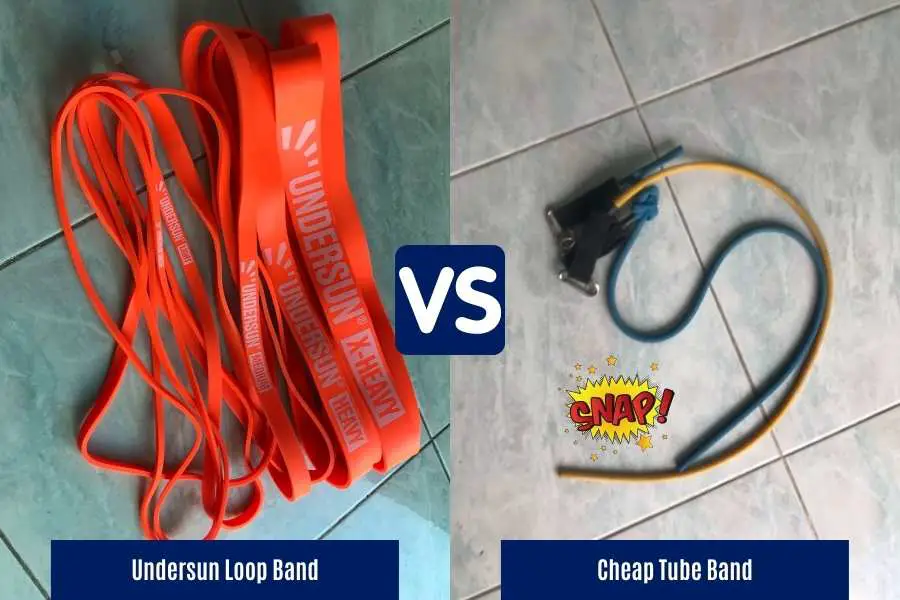
The 100% latex is supple and durable. It won’t break on you during a pull-up as a tube band will.
Yup, bands can snap!
What Are Resistance Band Pull-Ups?
Banded pull-ups are very similar to traditional pull-up. The only difference is that the former uses the elastic property of a band to make the movement easier. In comparison, the latter is completely unassisted and typically much harder to perform.
Banded pull-ups, band-assisted pull-ups, resistance band pull-ups…whatever you want to call them, they all refer to the same thing.
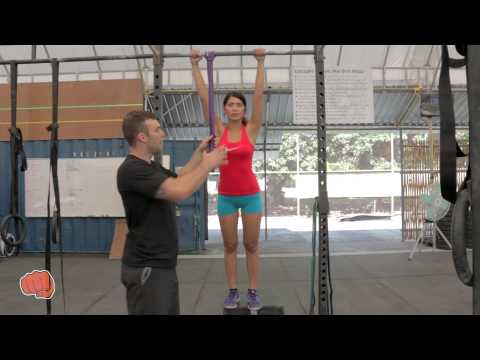
Think of them as the beginner’s version of a traditional pull-up; which by the way is notoriously difficult so don’t put yourself down if you can’t yet do one!
You tie one end of a resistance band to the pull-up bar.
And then you loop the other end of the band around your legs or glutes (butt).
The band stretches as your body lowers away from the bar.
And the tension generated helps to pull you back up like a slingshot.
As expected, some “snobs” like to call this pull-up variation a form of cheating.
But in my opinion, banded pull-ups are a cheap and effective way to build your pull-up strength when it is used properly (it worked for me!)
Below, I explain how they work and why they are so good!
How Do Band-Assisted Pull-Ups Work?
Banded pull-ups work similarly to other types of assisted pull-ups. A counterweight is presented beneath the individual which helps to push the body up and towards the bar. In the banded pull-up, the elastic property of a band serves as the counterweight.
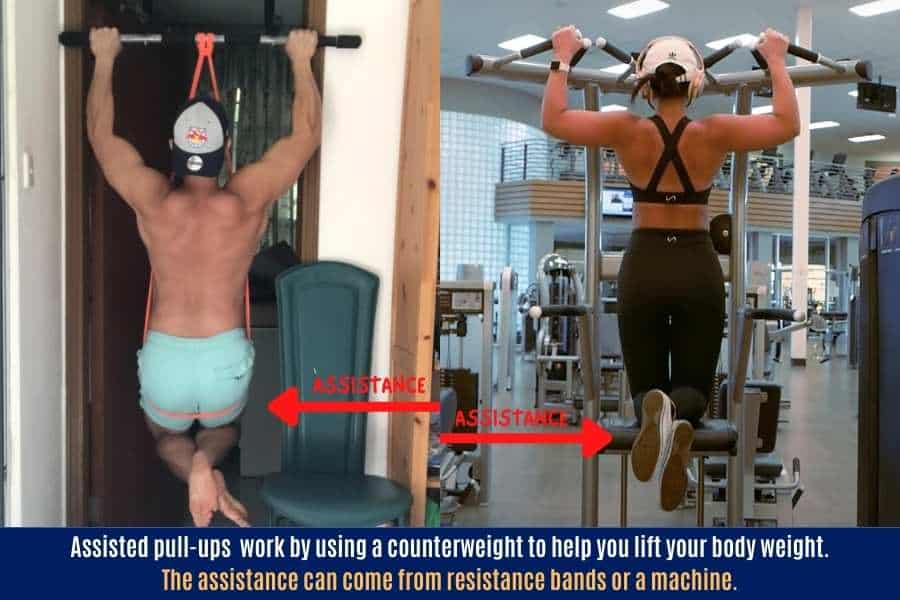
Therefore the resistance band pull-up is not too dissimilar to the assisted pull-up machines you commonly find at the gym.
Here’s how a pull-up assist machine works:
- The machine is a counterweight platform. This is a weight-loaded shelf for you to rest your knees on.
- The platform pushes upwards against your body. Therefore it “counters” the effect of gravity which is trying to pull your body toward the floor.
- This effectively reduces your body weight. Since the counterweight essentially makes you “lighter”, it’s easier to pull yourself up toward the bar!
The difference between using bands and a machine to assist your pull-up is that, unlike a machine, you don’t need to sell your soul to buy resistance bands for the home!
Jokes aside, resistance bands have a unique property that makes the assistance they provide slightly different from a machine. I’ll explain this later.
But first, let’s learn how to use resistance bands to do pull-ups!
How To Set Up Assisted Pull-Ups With A Resistance Band
Assisted pull-ups can be set up using a resistance band. One end of the band is first hooked around the bar using a circular knot. The trailing end can then be looped around the person’s thigh, feet, or buttocks to provide pull-up assistance.
Here’s a step-by-step on how to set up a resistance band for assisted pull-ups:
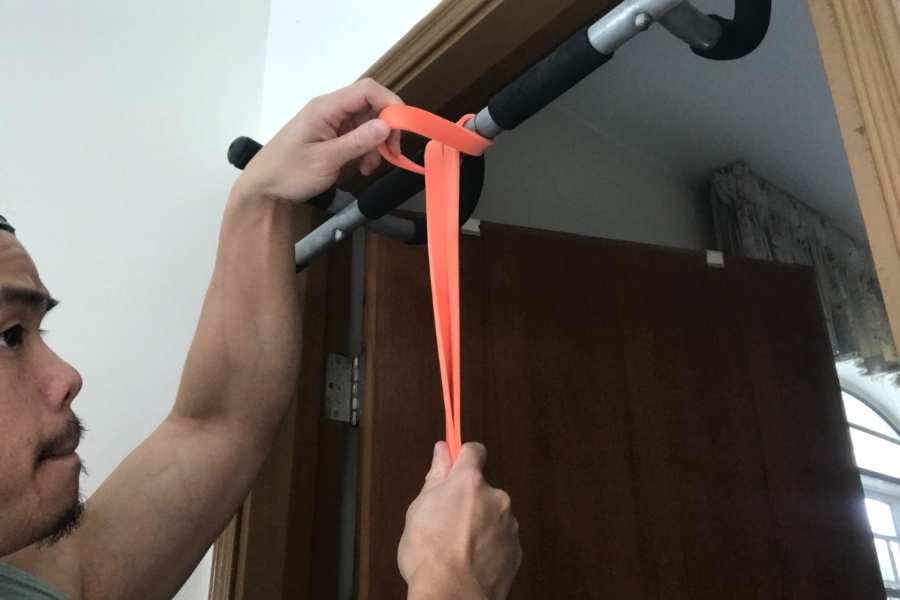
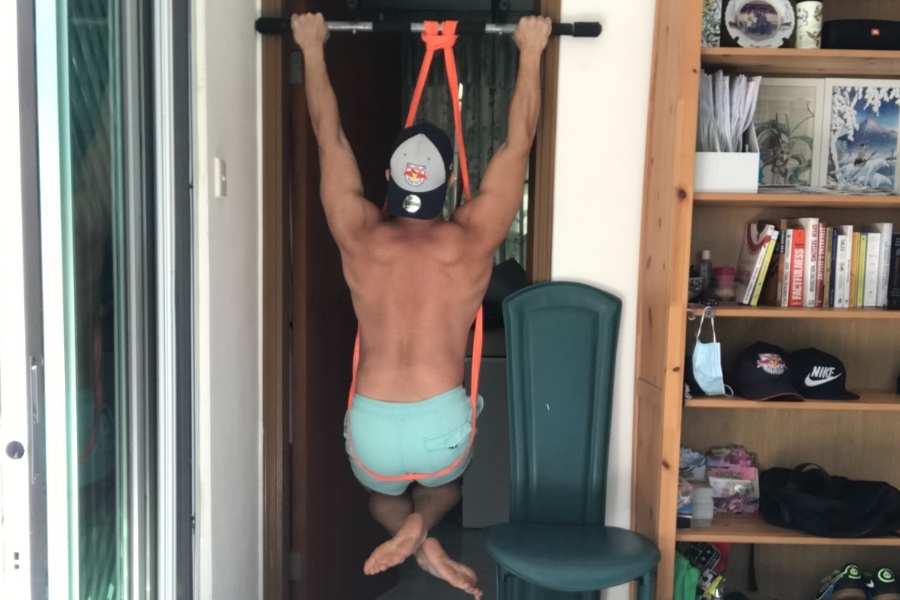
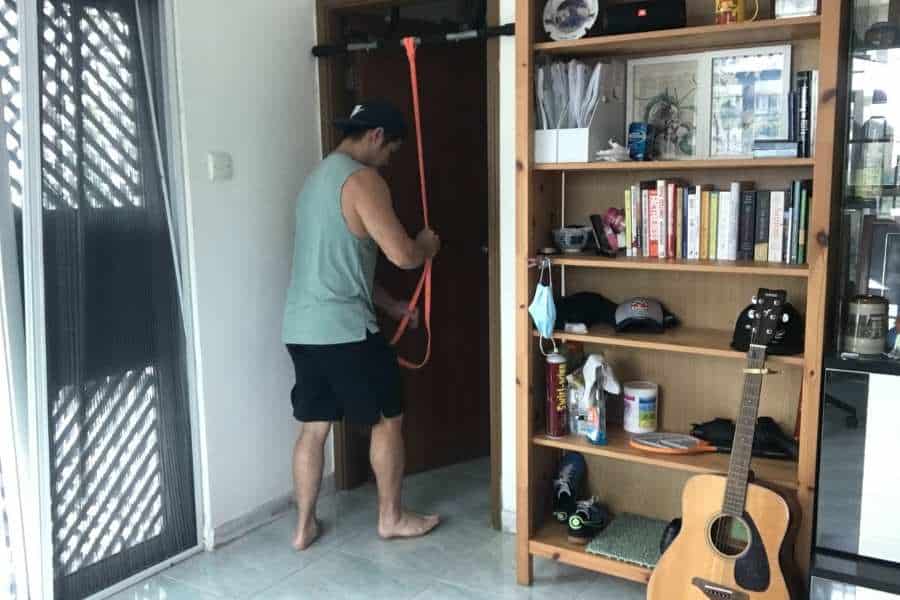
- Hook a circular knot to secure the resistance band. I found the simplest way is to loop one end of the band into itself (as shown in the picture).
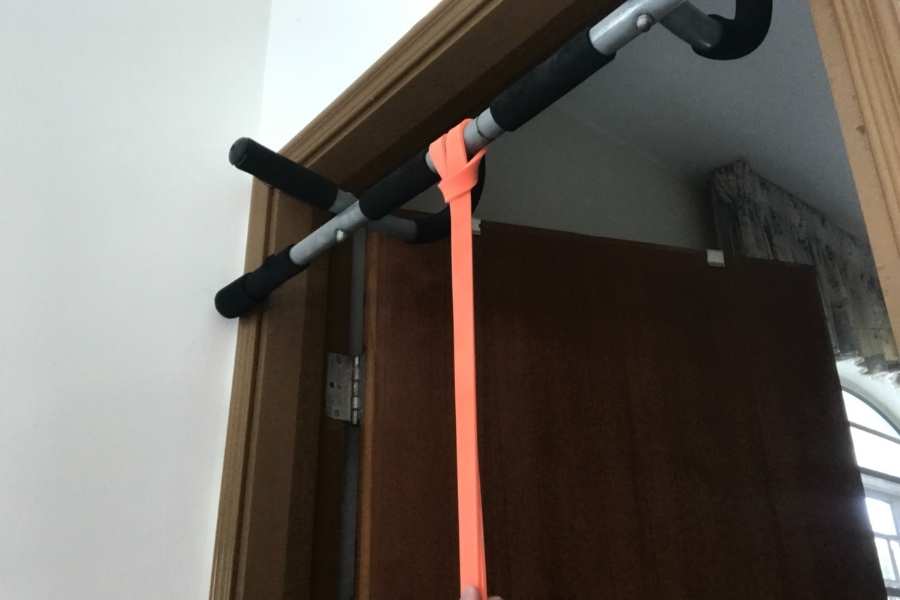
- Pull the band tight. Hooking the band onto the bar is quite hard to get wrong, but you still want to make sure the knot is tight. Double-check!
- Pull the trailing end of the band down to knee level. You want it at a height that’s comfortable for you to insert your feet through.
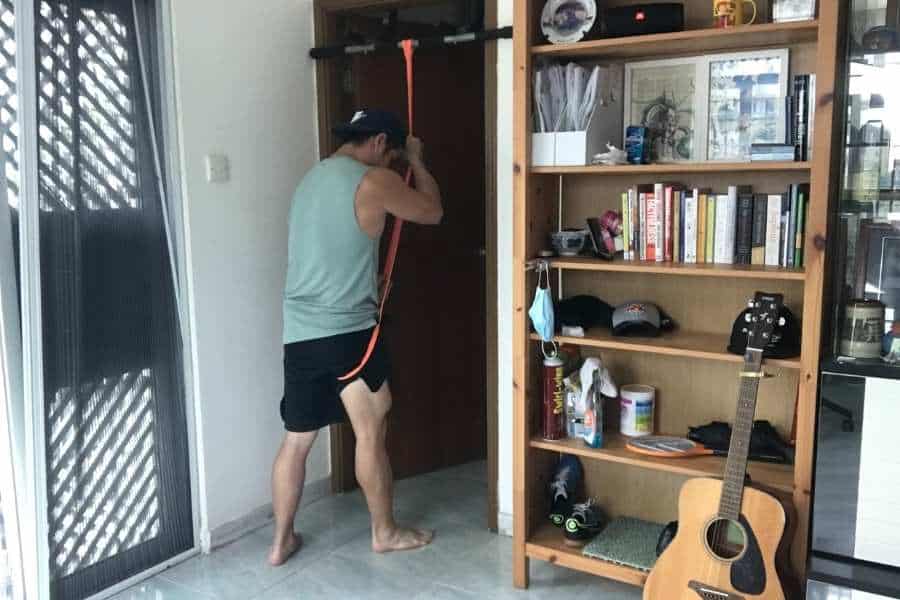
- Insert one leg through the loop. Most people find it easiest to hook the loop around the inside of the knee. But you can also hook it around the soles of your feet or buttocks. Each method will provide different amounts of assistance.
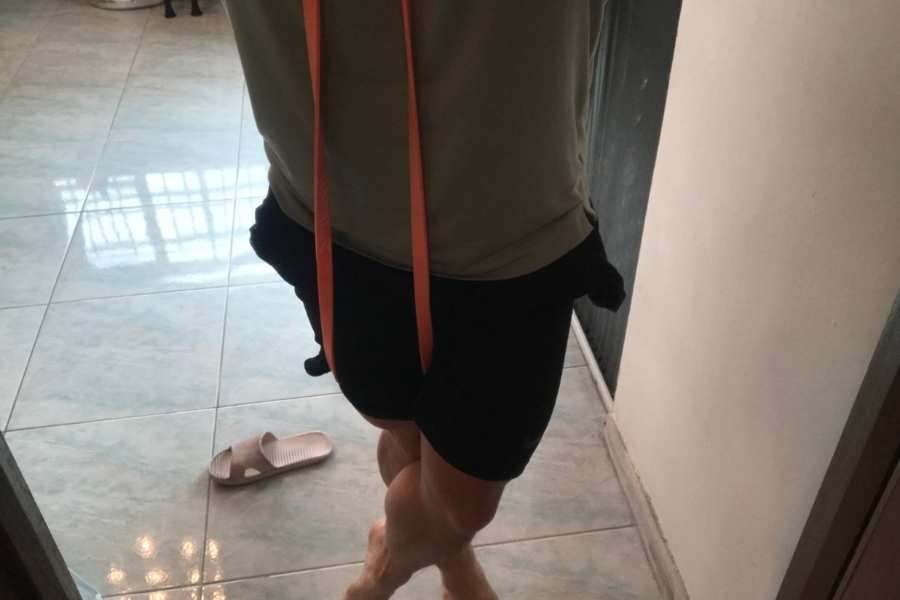
- Use the opposite leg to secure the band. The idea is to use the opposite leg or foot to clamp the band securely against your body.
- Initiate the assisted pull-up. Check the next section for tips!
How To Use Resistance Bands To Do Assisted Pull-Ups
Assisted band pull-ups are executed similarly to regular pull-ups. First, the bar is held using an overhand shoulder-width grip to assume a dead hang. Next, the shoulder blades are retracted and the core engaged. Finally, the body is pulled towards the bar.
As you have probably guessed, that’s the simple version.
Here’s a detailed step-by-step on how to execute the resistance band assisted pull-up, properly:
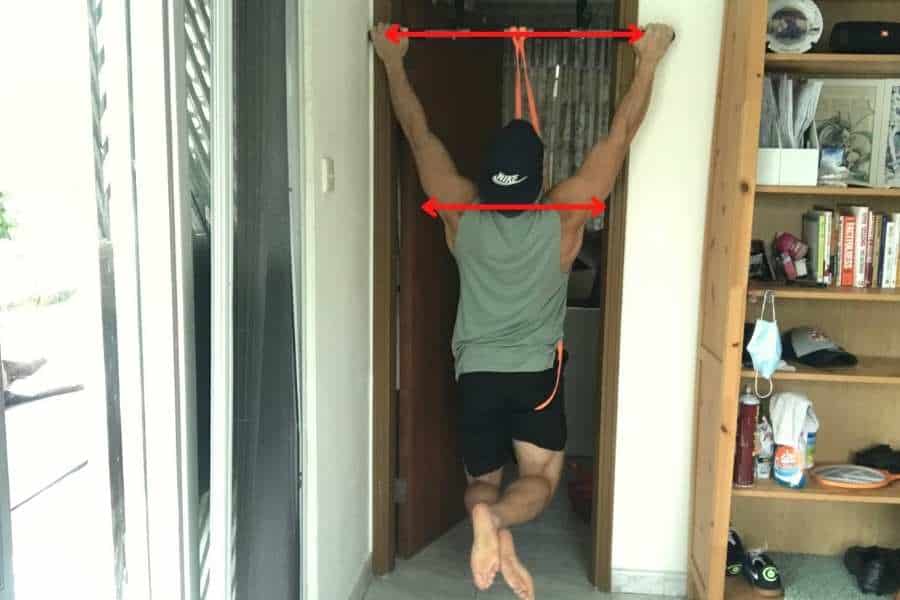
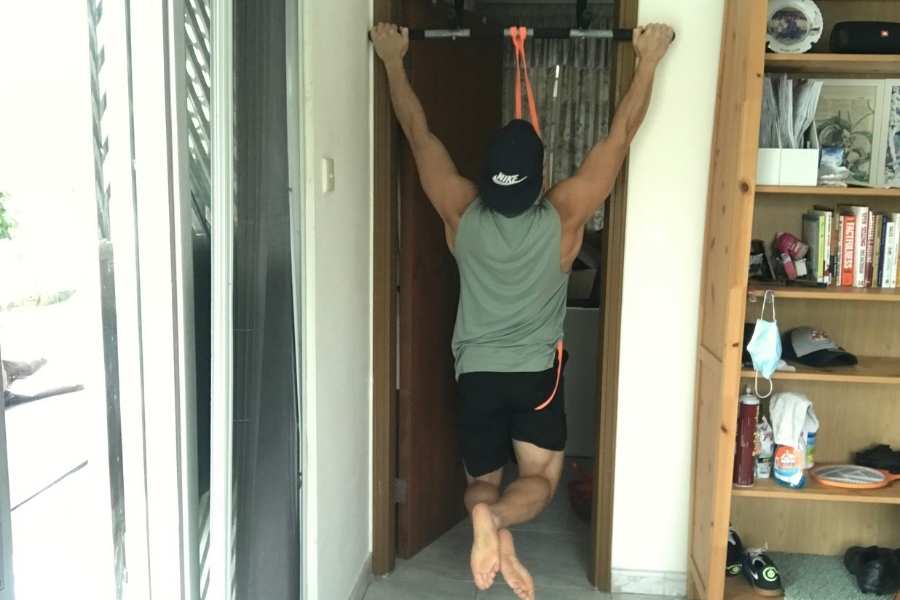
- Hold the bar with an overhand grip. A pull-up uses an overhand grip whilst a chin-up uses an underhand grip. Be careful not to have your hands too far apart or too close together. I find the ideal distance is just a bit wider than shoulder width.
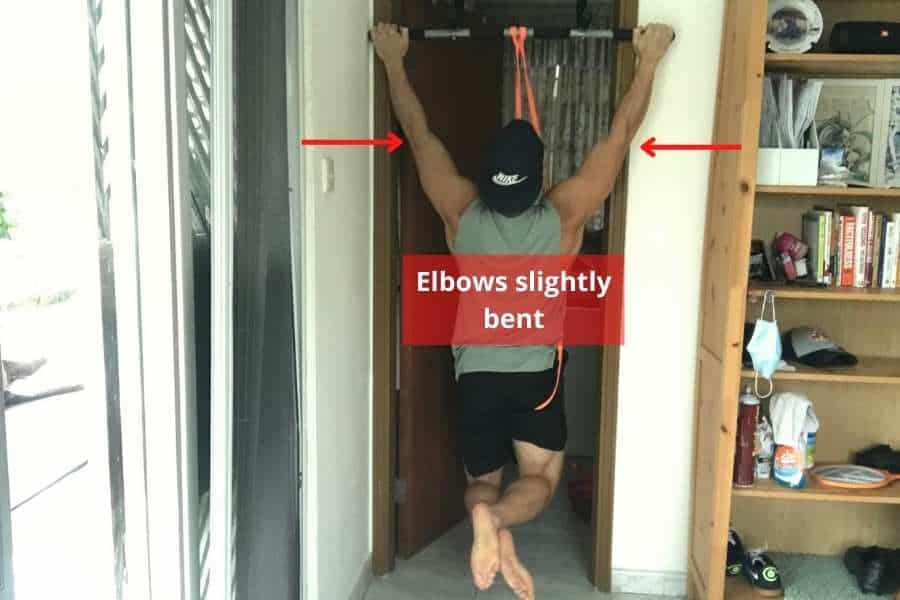
- Assume a dead hang position. This simply describes hanging off the bar from both hands. I like to introduce a slight bend in both elbows to take pressure off my shoulders.
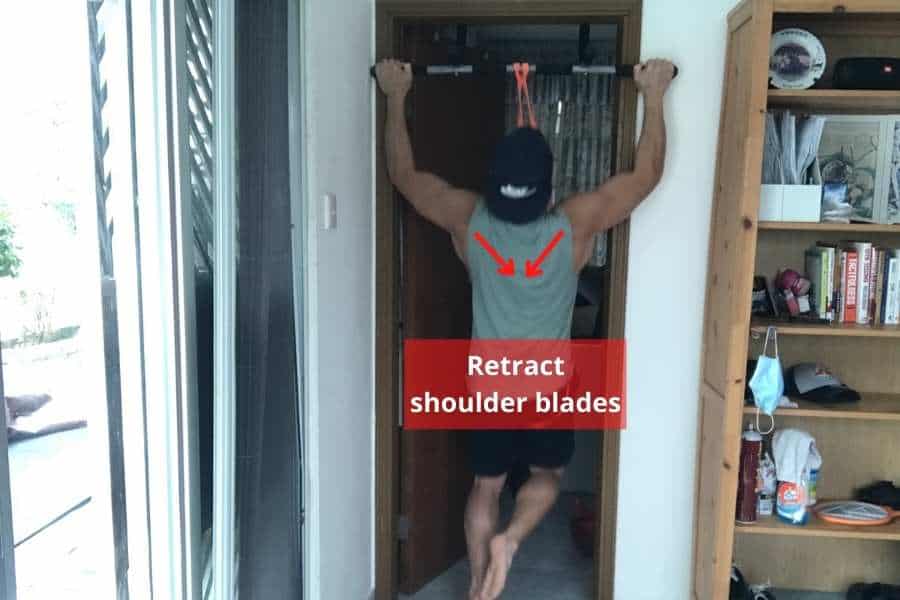
- Retract the shoulder blades. This is done by simply pulling your shoulders backward. You should feel your back tense up.
- Engage your core. Contract your abs like you’re preparing to be punched in the stomach! This keeps your torso rigid and prevents you from flailing about mid-pull-up.
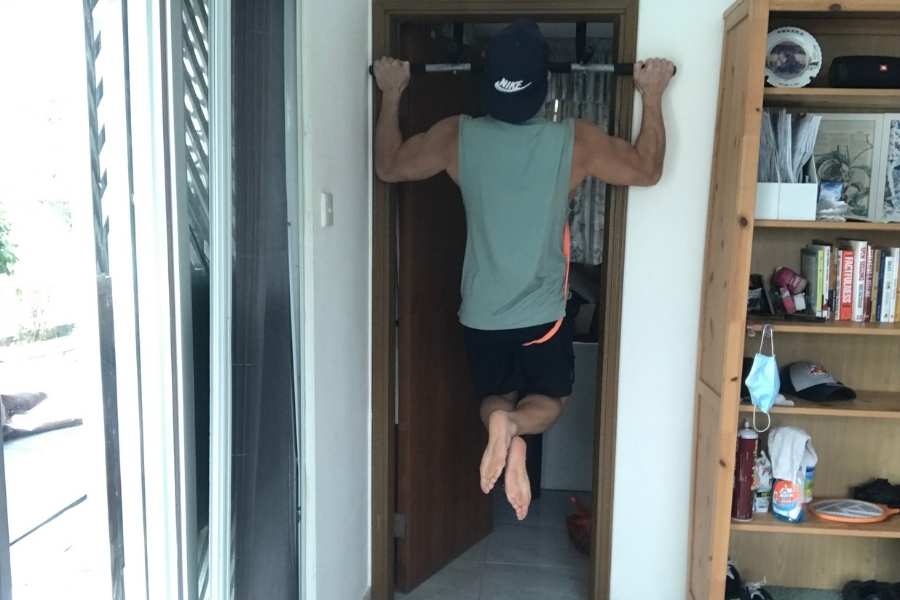
- Pull the chest towards the bar. Focus on bringing your elbows towards your back rather than just pulling with your arms. This engages the back muscles which are larger and more powerful than the biceps.
- Stop when the chin clears the top of the bar. This is your cue to stop the pull-up movement. Make sure the resistance band is still firmly looped around your leg.
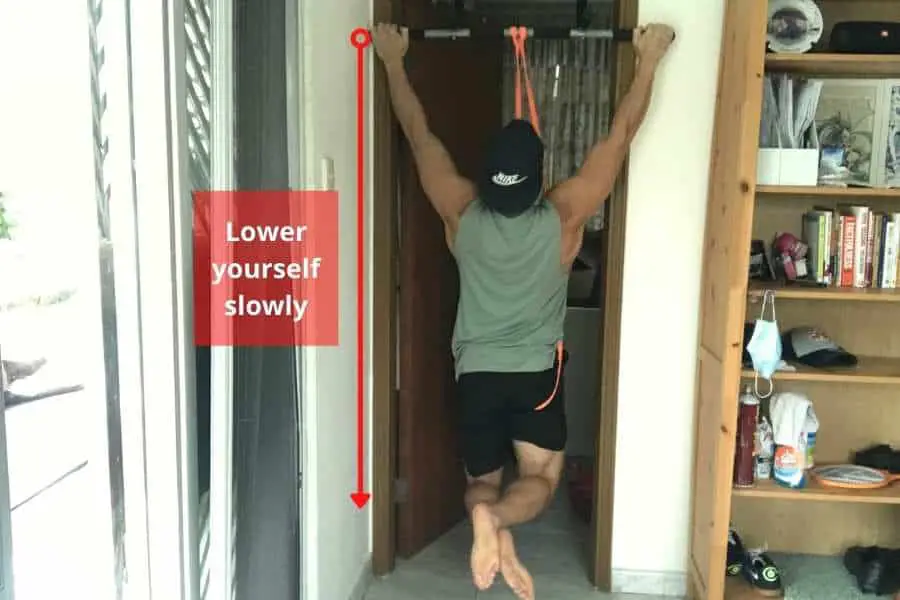
- Slowly lower the body back downwards. A common mistake is to simply let gravity pull you back down. You should control the descent. This is the eccentric contraction, which studies have shown to help improve your pull-up strength.
Congratulations on learning how to do a resistance band-assisted pull-up!
Why Resistance Bands Help With Pull-Ups
Resistance bands generate variable tension to assist with pull-ups. Tension increases as the band stretch longer, and maximum assistance is provided at the bottom of the exercise. This helps a beginner overcome their body weight to pull themselves toward the bar.
Put simply- the type of assistance provided by a band is different from that given by a machine, as follows:
| Pull-Up Assist Method | Assistance Type | Assistance At The Top | Assistance At The Bottom |
|---|---|---|---|
| Machine | Constant | Same | Same |
| Resistance Band | Variable | Low | High |
Speaking from personal experience, I prefer banded pull-ups because of their variable-level assistance.
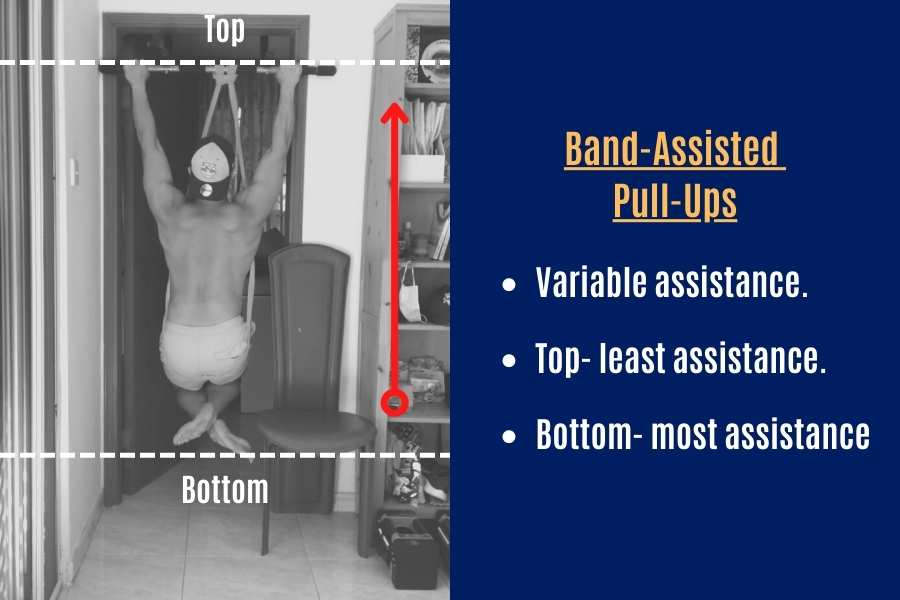
Here, minimal help is provided near the top of the pull-up; this is the portion of the movement that I found relatively easy.
But maximal help is provided near the bottom of the pull-up; the portion of the movement that lacked strength and found the most difficult.
As far as I know, most beginners share a similar experience with pull-ups.
And it makes sense to focus assistance only in the areas you need it most right?
Put another way- if you’re goal is to build pull up-strength, then it’s a good idea to focus on addressing your weaknesses rather than your strengths!
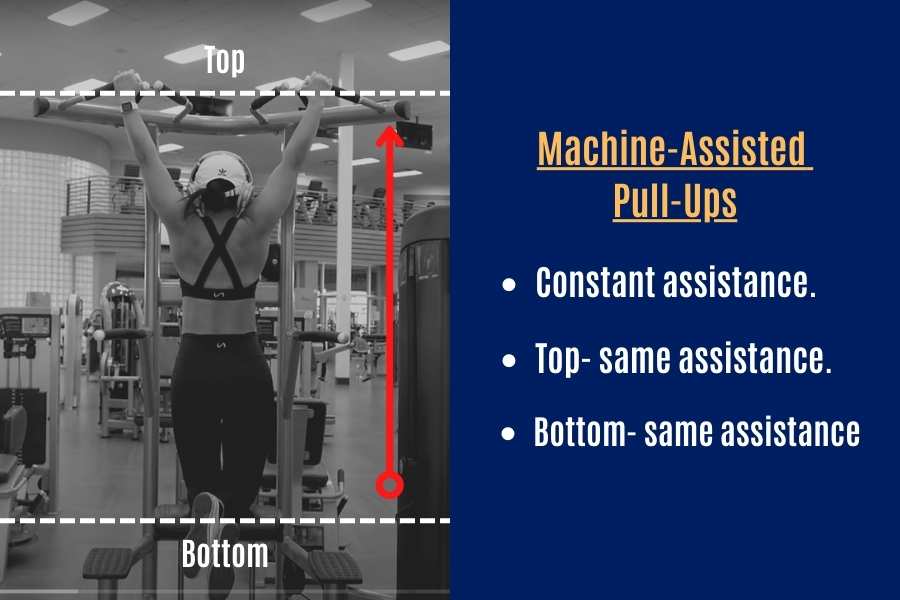
In contrast, a machine provides a constant level of assistance based on the weight you set.
Assistance remains the same regardless of what position- top or bottom- you are on the pull-up.
For more information on the unique variable tension property in bands, you can check out my other post which explains how resistance bands work and why they are so effective!
Are Band-Assisted Pull-Ups Really Effective?
Resistance band-assisted pull-ups are good for beginners. They are an effective way for someone who cannot do a traditional pull-up to practice the exercise and build pulling strength. However, it is recommended to reduce, and eventually remove, assistance over time.
I won’t sugarcoat things.
There’s a community of people who vehemently disapprove of banded pull-ups, labeling them as ineffective.
The main crux of their reasoning is along the lines that the assistance provided is considered to be “cheating”.
And if you aren’t going to do it properly why do it at all…
“When you use a band, you are replacing your own muscles with a machine. How is that helping you at all? It isn’t.”
Marc, MoetFit
But I disagree.
Yes, resistance band pull-ups are much easier than their unassisted variant (obviously!).
And there are also other effective ways to improve your pull-ups, like doing jumping pull-ups and negative pull-ups.
Furthermore, keeping to a high level of assistance most likely won’t see you making many strength gains in the long term.
HOWEVER, I do think that the band-assisted pull-up is an effective exercise for beginners to start with and for helping someone who cannot do a pull-up at all.
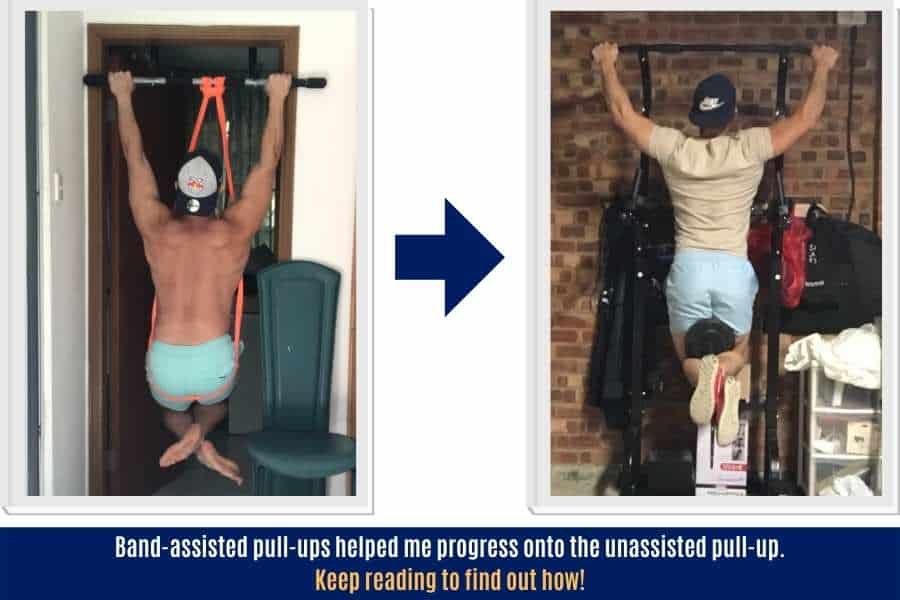
I know it helped me…a LOT.
With that being said, I also feel it’s essential to eventually progress onto the unassisted pull-up by reducing assistance over time (I explain how later).
This will take an active effort on your behalf.
After all, it’s tempting to stay on a high degree of assistance rather than pushing yourself.
But doing this will be counterintuitive to your goals of mastering the pull-up for maximum benefits!
Benefits Of Doing Resistance Band Pull-Ups
So far, I’ve presented the case that band-assisted pull-ups are a great way for beginners to work on the exercise if they cannot already do the unassisted variation.
Here are 4 additional benefits of doing resistance band pull-ups for a beginner, based on personal experience:
- Grip strength can improve independently from pull-up strength. Your ability to hold the pull-up bar is essential to success. A weak grip is one of the main reasons why beginners struggle to pull themselves up to the bar. By using resistance band assistance in your pull-ups, you can slowly but gradually work on improving a weak grip alongside building your pulling strength.
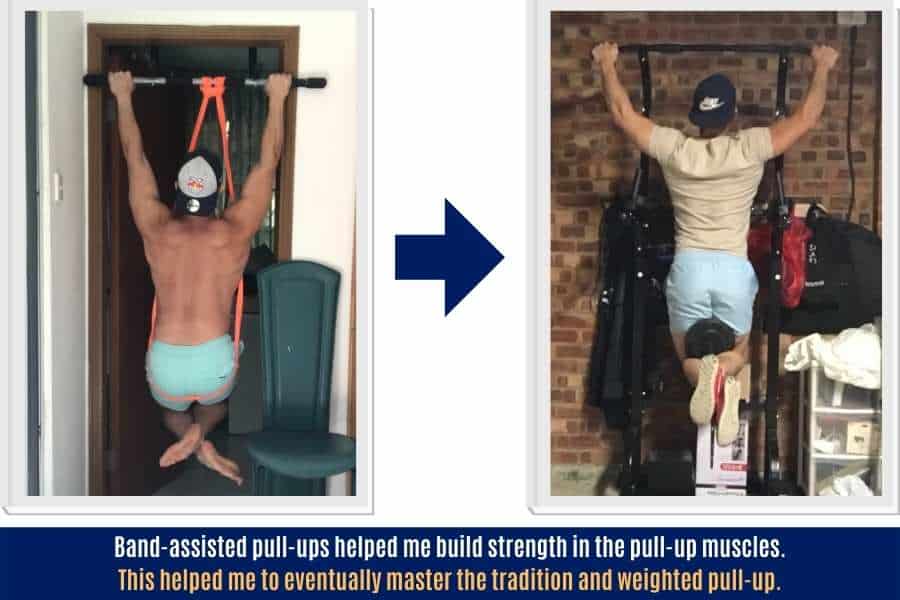
- Increase strength in pull-up muscles. When done right, banded pull-ups work the same target muscles as regular pull-ups. These muscles will get stronger the more often they are used. And this will help you to do regular pull-ups when the bands are removed altogether.
- Familiarise with pull-up form. The pull-up has a specific movement pattern and form that needs to be mastered to execute the exercise properly. This can be hard to practice when you can’t even do a single pull-up! Banded pull-ups allow you to work on your form and build confidence, whilst simultaneously building your pull-up strength.
- Improve core stability. Your abs should be engaged to keep your torso rigid and balanced during a pull-up. But this important cue can be hard for a beginner to actively pay attention to when your mind is already preoccupied with not being able to do a single pull-up! Banded pull-ups allow you to practice tightening your core as you go through the movement.
If you’re contemplating taking up resistance band training, you might want to check out my other post to find out why resistance bands are good and effective for beginners!
Muscles Worked By Banded Pull-Ups
Banded pull-ups done with the correct form will work the same muscles as regular pull-ups. The primary target muscles include the latissimus dorsi, trapezius, posterior deltoids, and rhomboids. Secondary muscle activation also comes from the biceps, core, chest, and shoulders.
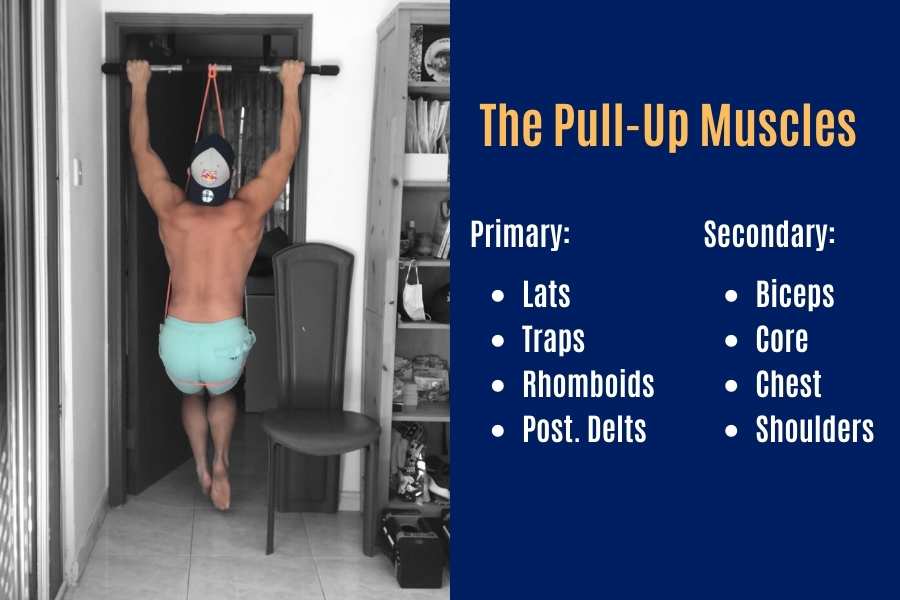
Here’s what each muscle is responsible for in the pull-up:
| Target Muscle | Role | Function In The Banded Pull-Up |
|---|---|---|
| Latissimus dorsi | Primary | Brings your shoulders downwards and backward. |
| Trapezius | Primary | Allows for a controlled descent from the pull-up bar. |
| Posterior deltoids | Primary | Brings your upper arm downwards and backward. |
| Rhomboids | Primary | Shoulder blade retraction at the beginning and end of the pull-up. |
| Biceps | Secondary | Elbow flexion during the middle and end of the pull-up. |
| Core | Secondary | Keeps your torso rigid throughout the pull-up. |
| Chest and shoulders | Secondary | Stabilizes the torso throughout the pull-up. |
You can see that the banded pull-up, just like the regular pull-up without resistance bands, requires multiple muscles to fire synchronously.
Therefore the pull-up is said to be a compound movement.
Most of the pulling work comes from your back muscles.
But your biceps also kick in towards the middle and end when you approach the bar.
The other secondary muscles serve mainly to keep your torso rigid as you pull yourself up and lower yourself back down.
How Many Reps And Sets To Do With Assisted Pull-Ups
A moderate number of sets and reps are ideal for assisted pull-ups. Beginners are recommended to start with 4 sets of 10-15 repetitions per workout. As the person becomes stronger, assistance should be reduced and the reps should be decreased until they can do an unassisted pull-up.
The reasoning behind this training volume (reps and sets) is as follows:
- 4 sets per workout are optimal. Assuming you challenge yourself in those sets, 4 sets are enough to drive strength and muscle gains. But it’s not too much that you enter the “junk sets” zone.
- 10-15 reps can build muscle in beginners. This is considered to be a moderately high rep range which wouldn’t otherwise be optimal for muscle gains in a traditional pull-up. But a higher rep range like this works well for the intensity you’re lifting in assisted pull-ups. A higher rep range also allows you to practice the pull-up movement without the stress of pulling more weight than you can handle.
These are general recommendations for a beginner to start with.
Remember- always make sure the last few reps of each set are challenging your muscles (you should feel fatigued mostly in your biceps and the lats underneath your armpits).
If you aren’t feeling challenged, you can decrease the assistance until you find that sweet spot in terms of difficulty.
Most importantly- avoid exceeding 15 reps per set. If you need to increase difficulty, then decrease the assistance instead by using a lighter resistance band color or weight classification.
Resistance Band Size For Band-Assisted Pull-Ups
The size of your resistance band is crucial in assisted pull-ups. The assistive weight should facilitate bringing your body towards the bar. But it should not provide so much assistance that no effort is required on your behalf.
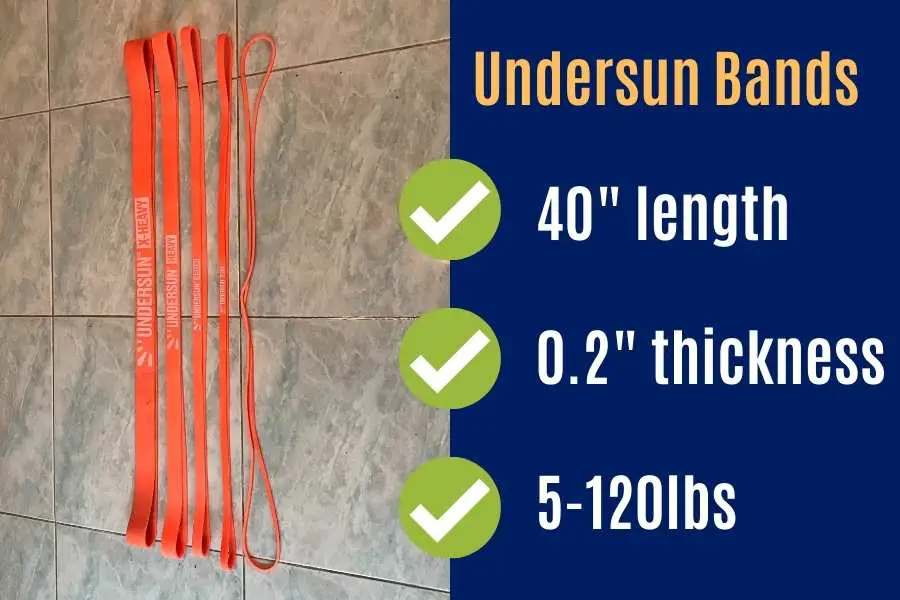
Speaking from personal experience, a good resistance band size for assisted pull-ups is as follows:
- 40″ length. Long enough to comfortably wrap around the pull-up bar and your legs.
- 0.2″ thickness. A thick band is a durable band which is important because it’ll be stretched (a lot!) during banded pull-ups.
- 50lb resistance. This is generally considered to be a medium-sized band. It’ll provide the average beginner with a suitable amount of assistance.
Remember- the idea behind using a resistance band is to ASSIST you in performing pull-ups.
It’s not there to do it FOR you.
Therefore you must choose a suitably sized band.
The above are general recommendations for a beginner.
In reality, you’ll need to choose a level of resistance that’s suited to your strength levels.
A set like the Undersun Fitness bands gives you access to a variety of resistance levels.
This means you won’t be stuck with the wrong band.
It also means you won’t be pigeonholed in your progression since you can work your way from the heavy bands to the light bands as you get stronger on the pull-up!
For more details on choosing the right size pull-up assist bands, you can check out my other post on resistance band length and weight for pull-ups.
Progressing With The Banded Pull-Up
A progression plan is essential for building strength in the banded pull-up. Beginners should start with band assistance at the start. But as they become stronger, assistance should be reduced until they can perform pull-ups without any bands.
Here’s an example of a banded pull-up progression plan:
- Start with pull-up simulation band exercises. Various pull-up alternative exercises with bands can be used to target the same muscles as a pull-up, but with slightly less intensity. The idea is to build a foundation of strength.
- Do 15 reps of banded pull-ups using a medium-sized band. This provides around 50lbs of resistance.
- Practice 10-second dead hangs. Hang from the bar without pulling yourself up. This improves grip strength.
- Reduce to 12 reps of banded pull-ups using a light band. This provides around 25lbs of resistance.
- Increase dead hang time to 20 seconds. Keep building and improving your grip strength.
- Reduce to 8 reps of banded pull-ups with an extra-light band. This provides around 10lbs of resistance
- Progress onto 1-3 reps of unassisted pull-ups. You’re almost there! It’s ok to progress slowly.
- Increase pull-up reps over time. Aim for 1 rep in your first week. Then 2 reps in your second week, and so
The idea is to use banded pull-ups to strengthen your target muscles (aka the pull-up muscles) over time.
This entire progression plan should proceed over a few months. Start on step 1 and progress onto the next step every 1-2 weeks.
By progressively lowering the assistance, you should get stronger over time.
And given enough time, you should be able to transition from assisted to unassisted pull-ups!
Don’t forget about the accessory exercises.
Dead hangs are a great accessory exercise to start with. But jumping pull-ups and negative pull-ups are also great!
Best Resistance Bands For Pull-Up
Circular loop-style resistance bands are generally the best for assisted pull-ups. This type of band has the ideal length, tension, and durability for a banded pull-up. Other types of bands are usually too short, too light, or not durable enough.
You may have even come across bands labeled as “pull-up bands”.
Having tried these myself, I don’t feel they are anything special.
They’re just like any other type of loop band.
I use and recommend the resistance band set by Undersun Fitness (link for my hands-on test).
Unlike the tube-style bands (you know the cheap ones on Amazon with handles), these won’t snap and break after a few months.
In fact, they’re protected by a lifetime warranty!
And the best thing about them is the set comes with 5 different tension levels.
This means you won’t choose the wrong band, have to send it back for a refund, and wait for the new ones to arrive.
Buying a band set is not that much more expensive but it’ll save you a lot of time and frustration.
Additionally, the 5 different tension levels allow you to progress, from a beginner who can’t yet do a pull-up, to turning into a pull-up machine!
Conclusion
I’ve shared my comprehensive guide on what resistance band pull-ups are, why they are effective, and how to do them.
Having been through the trenches of being a beginner who can’t do a pull-up myself, I feel band-assisted pull-ups have a place in a newbie’s program.
They were certainly effective in helping me master my first unassisted traditional pull-up.
However, it’s important to not let the band assistant completely take over the movement.
At the end of the day, assisted band pull-ups should still challenge you. So make sure you choose an appropriate band.
And it’s also best practice to reduce the band weight as you get stronger and eventually remove them altogether!
What do you think about resistance band pull-ups?
Feel free to send me a message if you have any questions! You can find my details on the “contact us” page.
You may also be interested in the downloadable Kalibre Blueprint PDF which details exactly how I gained 40lbs of lean muscle (it’s 100% free!). It details the exact exercises and nutrition (with printable worksheets) I used to go from skinny to ripped!
Thanks for reading guys!
Peace Out,
Kal
(Biochemistry BSc, Biomedical Sciences MSc, Ex-Skinny Guy)