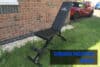
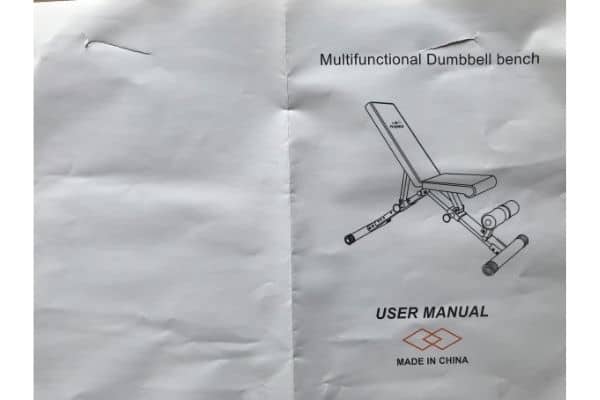
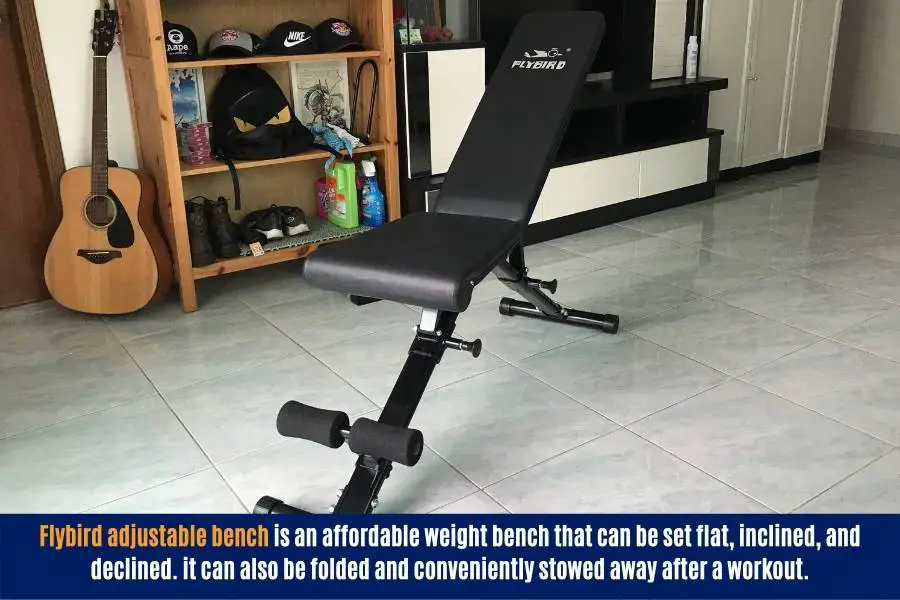
Adjustable weight benches are usually pretty intuitive. But the instruction manual for the Flybird weight bench is quite simplistic, and it can’t be found online either. So if you’re a new owner having difficulties with your bench, or a potential buyer who just wants to know how the bench works, then keep reading. These are the full instructions for the Flybird FB149 adjustable weight bench.

You can find out more about all the pros and cons in my Flybird FB149 adjustable bench review!
I’ll detail how to assemble, adjust the FID angle, and fold the bench.
These are the points that I struggled to find online, before purchasing the bench myself.
So let’s jump right in.
Note: this is a great bench for beginners and intermediates. In fact, I’ve tested all 3 Flybird benches (see results here), and the FB149 by far gives you the best value for money. Not only does it outshine its little brothers, but also a lot of it’s competitors.
- How To Asemble The Flybird Adjustable Weight Bench
- How To Adjust The Flybird Weight Bench
- How To Fold The Flybird Adjustable Weight Bench
- What To Do If Your Flybird Bench Becomes Faulty?
- Exercises You Can Do On The Flybird Bench.
- Is The Flybird Weight Bench Good?
- Cheapest Place To Buy The Flybird Bench And Ideal Dumbbell Pairing
- Conclusion
How To Asemble The Flybird Adjustable Weight Bench
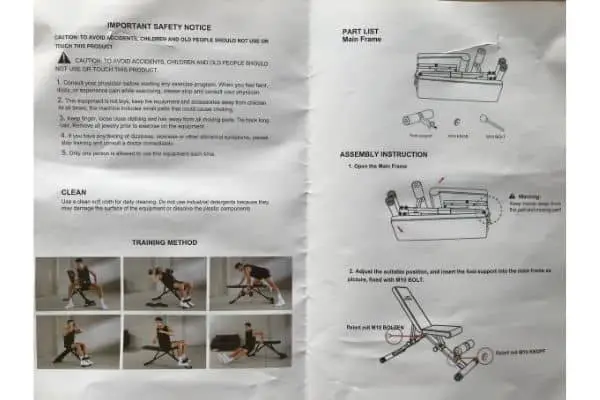
The Flybird FB149 adjustable weight bench comes partially assembled from the box. Assembling the weight bench requires the separate footrest to be attached to the mainframe. This can be done by hand-tightening a securement nut and does not require any additional tools.

Time to unbox and install:
10 minutes.
Time to tighten nuts (optional):
10 minutes.
Right from the box, you’ll get the main unit (backrest, seat, and frame), footrest, safety packaging, and the Flybird bench instructions manual.
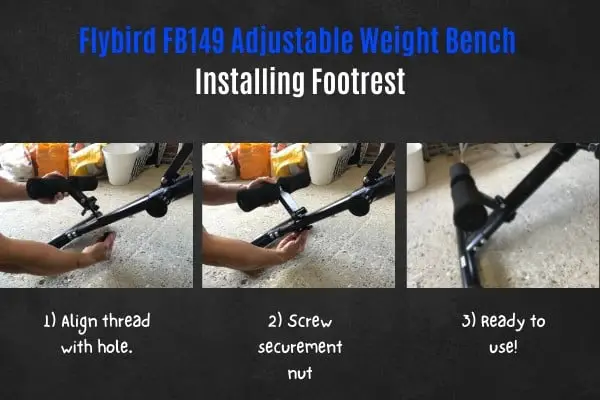
Simply insert the footrest thread through the hole in the frame, align the securement nut, and then hand-tighten.
Now you’re ready to go.
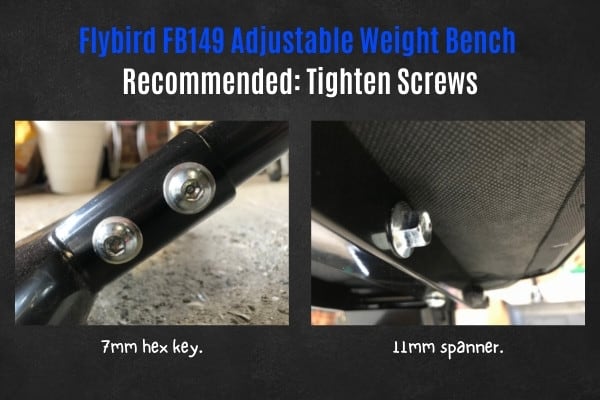
I’d also recommend you use a 7mm hex key and 11mm spanner to tighten the screws before use.
This is optional.
They should be tight already, but they may have become loose in transit.
Note on the footrest installation.
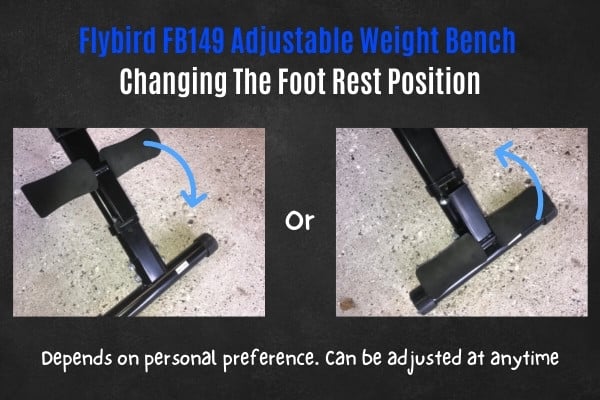
Depending on your preference, the footrest can be installed to either flip upwards or downwards.
This can be done by rotating the footrest before tightening the securement nut.
To have the footrest flip upwards, simply rotate the footrest by 180° (and vice versa).
How To Adjust The Flybird Weight Bench
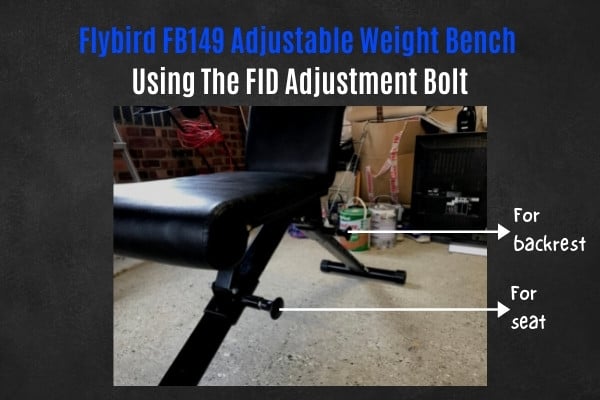
The Flybird FB149 weight bench angle can be adjusted by using the automatic bolt. This can be done by pulling on the bolt to unlock the securement mechanism, setting the desired angle of incline or decline, and then releasing the bolt to secure the setting.
This is explained in the Flybird bench instructions manual.
The adjustment mechanism itself is pretty simple.
The “automatic bolt” is a spring-loaded pin attached to a sliding bracket.
When you pull on the pin, the bracket unlocks and slides up and down the mainframe.
This allows you to incline/decline the backrest or seat.
When you release the pin, the mechanism locks itself back in place, and you can begin lifting your weights.
Inclining the bench.

The Flybird FB149 weight bench incline settings are as follows:
- Backrest has 4 incline settings: 0°, 20°, 40°, 50°, 85°.
- Seat has no incline settings.
Declining the bench.
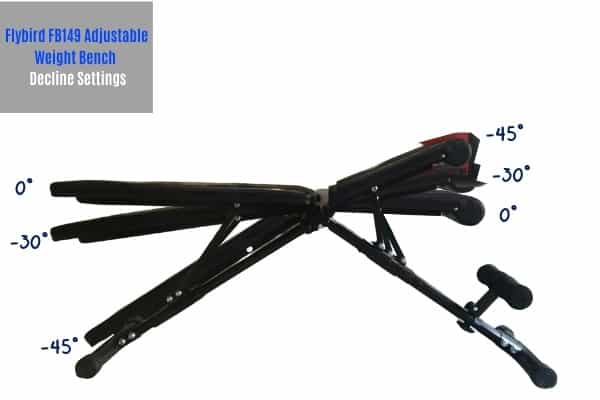
The Flybird FB149 weight bench decline settings are as follows:
- Backrest has 2 incline settings: -45°, -30°.
- Seat has 2 incline settings: -45°, -30°.
How To Fold The Flybird Adjustable Weight Bench
The Flybird FB149 weight bench is folded by hand. This is done by removing the safety bolt located on the central hinge underneath the backrest, folding the bench in half, and then re-inserting the pin. The reverse process is used to unfold the bench.
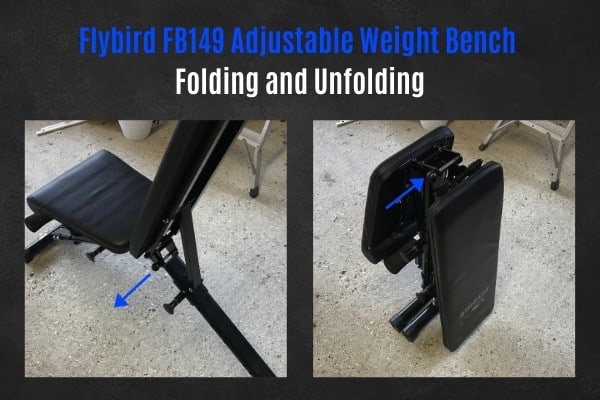
Again this is a simple process that’s shown in the Flybird weight bench instructions manual.
The safety bolt is essentially a steel pin with a spring-loaded notch.
This notch prevents the safety bolt from slipping out of the hole.

But be aware that the safety bolt is not physically attached to the bench.
So try not to lose it!
This is important because the safety bolt serves 2 functions:
- Prevents the bench from unfolding during storage.
- Stops the bench from buckling during use.
What To Do If Your Flybird Bench Becomes Faulty?
The Flybird weight bench instruction manual doesn’t detail the warranty policy or replacement parts process.
Neither does the Flybird website.
But I researched the Flybird adjustable bench on Amazon, and it comes with a 1-year frame and 30-day seat/backrest pad warranty.
Flybird also allows you to return the weight bench within 30 days for a full refund if you change your mind.
“You can return the item within 30 days of your order date if the merchandise is unused and remains in its original packaging with hangtags still attached.”
Flybird
Having used it for a year, I can say that the bench is very durable.
But if you do need replacement parts for your Flybird bench, then you can contact Flybird directly on their website.
It’s a small company so the same website is used by customers in the US, UK, and Canada.
Exercises You Can Do On The Flybird Bench.
Being an adjustable bench, you can use the Flybird FB149 to train all muscle groups.
Here are some of the exercises you can do on the Flybird adjustable bench:
- Flat bench press. Chest, arms, and shoulders.
- Incline bench press. Upper chest, arms, and shoulders.
- Decline bench press. Lower chest, arms, and shoulders.
- Dumbbell chest fly. Chest.
- Dumbbell pullover. Upper chest and back.
- Seated shoulder press. Shoulders and arms.
- Reverse incline dumbbell row. Back and arms.
- Single arm row. Back and arms.
- Sit-up. Abdominals.
- Box squat. Legs.
- Split squat. Legs.
For more examples, you can check out my other article for 36 beginner dumbbell exercises.
Mid-range adjustable benches like the Flybird are great when paired with heavy dumbbells. Or you can
Is The Flybird Weight Bench Good?
The Flybird weight bench is good for beginners. It’s affordable and comes with 7 incline and decline settings to train the whole body. However, it is a mid-range bench and will not offer the same stability and weight capacity as premium benches.
Overall, the reviews on Amazon are very positive.
Reddit users are a bit more critical of this bench.
But Reddit users are generally more fault-finding anyway (which is a good thing!).
I’ve been testing this bench for 1 year and I think it provides great value for money.
Whilst the frame isn’t heavy gauge steel, it’s still commercial-grade and can handle up to 700lbs.
The 2″ foam padding with faux leather lining is also comfortable to lay on.
Finally, the incline/decline adjustment mechanism is easy to use and works seamlessly.
But it does have a few downsides, such as the seat height and plastic foot grips.
All in all, the bench offers great functionality for beginners to train with limited space and budget.
For more general information, you can check out my other article to find out how reputable the Flybird brand is.
Cheapest Place To Buy The Flybird Bench And Ideal Dumbbell Pairing
| Bench | Brand | Description | Prime | Buy |
|---|---|---|---|---|
Top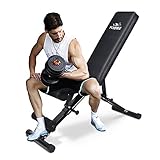 Top
Top
Top
Top
Top
Top Top
Top
Top
Top
Top
Top | Flybird | Fully-adjustable (flat/incline/decline) weight bench that can be folded for storage. Good for people 6'0 and over | PrimeEligible | Check Amazon Price |
 Top
Top
Top
Top
Top
Top Top
Top
Top
Top
Top
Top | Fitness Reality | Fully-adjustable (flat/incline/decline) weight bench that can be folded for storage. Good for people under 6'0 | PrimeEligible | Check Amazon Price |
 Top
Top
Top
Top
Top
Top
Top
Top | PowerBlock | BEST heavy adjustable dumbbell on the market. 5-90lbs (with addon kit) in 2.5lb increments make these great for building muscle and losing fat at home. Very durable. | PrimeEligible | Check Amazon Price |
 Top
Top
Top
Top
Top
Top
Top
Top | Yes4All | BUDGET alternative for a heavy adjustable dumbbell. Cheap and durable but fewer increments and slower adjustment speeds compared to the PowerBlocks | PrimeEligible | Check Amazon Price |
At first glance, the Flybird bench looks cheaper on the official Flybird site. But they charge for delivery. I got it delivered quickly from Amazon instead. It’s free of charge. You can check the cheapest price here.
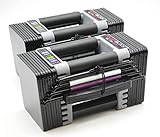
If you’re looking for some weights to go with your Flybird bench, then I highly recommend the Powerblock Elites.
These are fully adjustable from 2.5lbs all the way to 50lbs (and 70-90lbs with the addon kits).
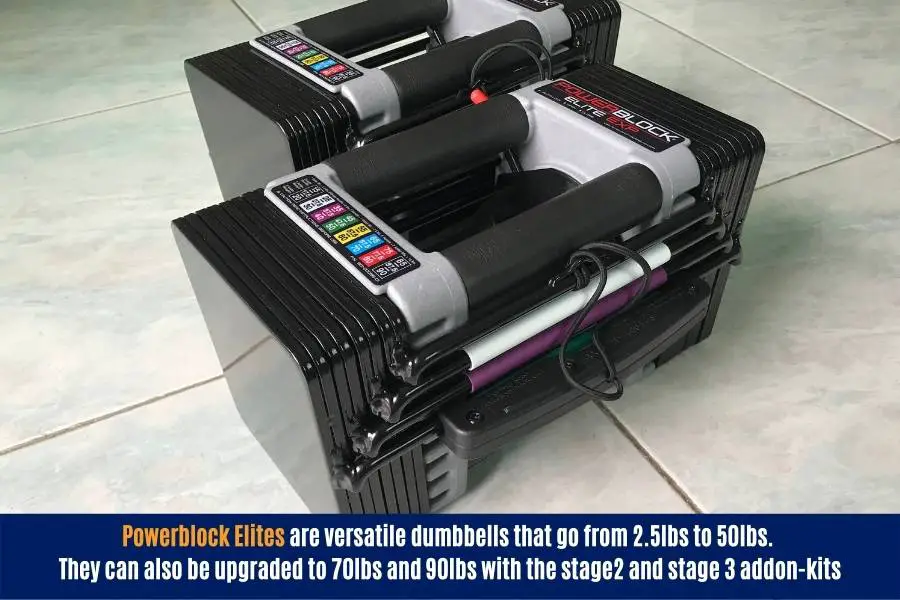
Having researched over a dozen different dumbbell models, I found the Powerblocks to offer the greatest value for money.
They’re not the cheapest dumbbells on the market, but they’re the cheapest of all the premium heavy dumbbells.
And when combined with the Flybird bench, you’ve got all the essentials for a great weight training workout.
I used the Powerblock and Flybird combo to help me gain 20lbs of muscle. That’s enough to transform a skinny physique.
Conclusion
The Flybird instruction manual is quite simple and it can’t be found online.
So I’ve provided you full instructions for the FB149 Flybird adjustable weight bench.
The information contained here comes from my personal experience with the bench, and what I feel new/potential buyers should know.
So I hope it helps!
Did you find my Flybird instruction manual helpful?
Feel free to send me a message if you have any questions! You can find my details on the “contact us” page.
You may also be interested in the downloadable Kalibre Blueprint PDF which details exactly how I gained 40lbs of lean muscle (it’s 100% free!). It details the exact exercises and nutrition (with printable worksheets) I used to go from skinny to ripped!
Thanks for reading guys!
Peace Out,
Kal
(Biochemistry BSc, Biomedical Sciences MSc, Ex-Skinny Guy)